Previous reading: 20240319 - OBC - Workshop 1 - Flash the software.
Necessary equipment:
- USB To Serial bridge. There are infinite of devices that can be used as a USB to Serial bridge. Pick your favourite.
The steps are the next:
- Connect the USB to Serial bridge to the OBC.
- Power the OBC.
- Login
- [Optional] Configure the WiFi network
- [Optional] Access though SSH from a another computer.
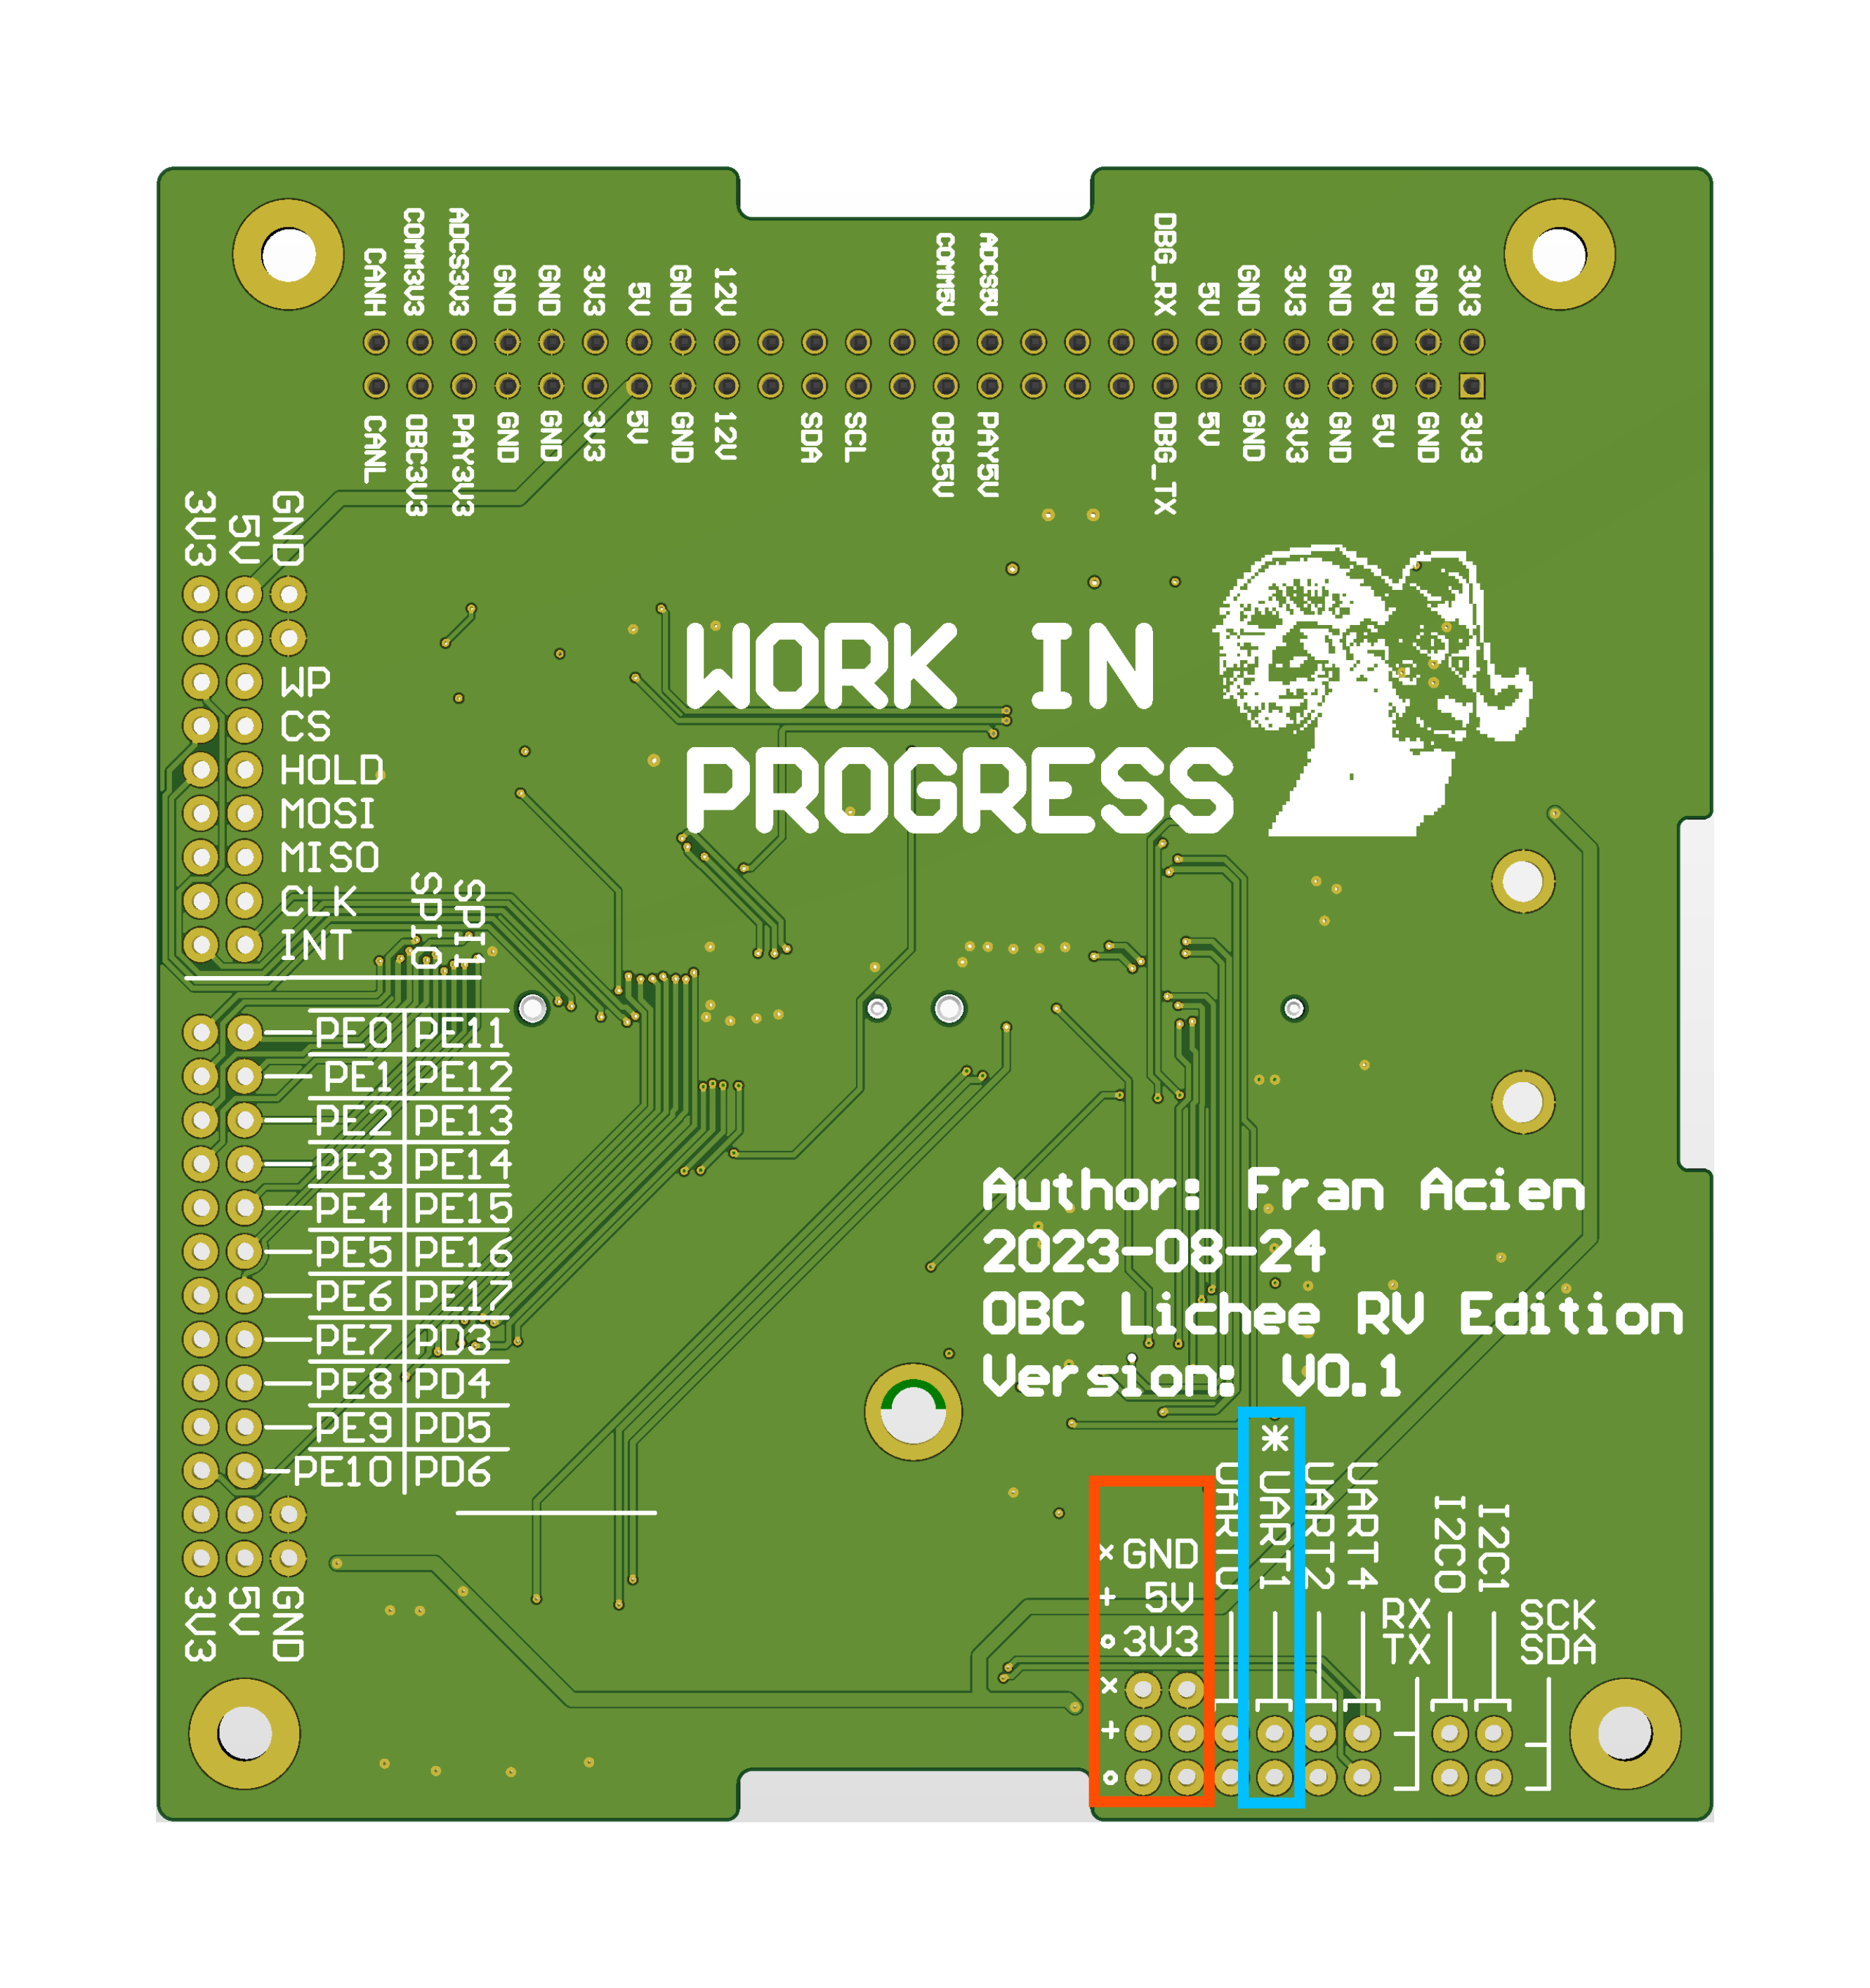
Connections
The connections are:
- RX of your “USB to Serial converter” to the UART1 TX of the OBC.
- TX of your “USB to Serial converter” to the UART1 RX of the OBC.
There are two ways to power the device. Using the EPS or by an external power source. If using an external power source is like:
- Connect 5V to any of the 5V pins
- Connect 3.3V to any of the 3.3V pins
- Connect GND to any of the GND pins
Login
First you need to open the USB to Serial on your Linux computer. It is recommended to use the tool called
tio. But there are multiple of different software to access USB to Serial. The baudrate of the UART OBC is 115200. The command with tio is the next one:
$ tio -b 115200 /dev/serial/by-id/usb-Silicon_Labs_CP2102_USB_to_UART_Bridge_Controller_0001-if00-port0
You will see all the output of the Kernel linux, and after 1 minute you should be able to access the terminal.
The root user is root, and the password is rootpwd. There is another user for normal operation, is user obc with password obcpwd
[  OK  ] Started D-Bus System Message Bus.
         Starting DHCP Client Daemon...
[  OK  ] Started Save initial kernel messages after boot.
         Starting Remove Stale Onli…t4 Metadata Check Snapshots...
         Starting Dispatcher daemon for systemd-networkd...
         Starting System Logging Service...
         Starting User Login Management...
         Starting WPA supplicant...
[  OK  ] Finished Raise network interfaces.
[  OK  ] Started System Logging Service.
[  OK  ] Started WPA supplicant.
[  OK  ] Started DHCP Client Daemon.

Ubuntu 22.04.4 LTS lichee hvc0

lichee login:
Ubuntu 22.04.4 LTS lichee ttyS0

lichee login: root
Password:
Welcome to Ubuntu 22.04.4 LTS (GNU/Linux 6.1.0-rc3-ge56c43a61610 riscv64)

 * Documentation:  https://help.ubuntu.com
 * Management:     https://landscape.canonical.com
 * Support:        https://ubuntu.com/pro
Last login: Tue Nov 21 20:57:54 UTC 2023 on ttyS0
root@lichee:~#
At this point we can access all the files, execute code, or even get the can messages of the satellite.
[Optional] Configure the WiFi network
In order to configure the Wifi of the OBC and be able to connect wireless you need to do the next:
- Execute the next command with the info of you network:
wpa_passphrase myssid my_very_secret_passphrase - Paste the output on
etc/wpa_supplicant/wpa_supplicant.conf - Add at the end of the file the next information
ctrl_interface=/run/wpa_supplicant
update_config=1
The result etc/wpa_supplicant/wpa_supplicant.conf should look something like:
network={
	ssid="myssid"
	#psk="my_very_secret_passphrase"
	psk=ccb290fd4fe6b22935cbae31449e050edd02ad44627b16ce0151668f5f53c01b
}

ctrl_interface=/run/wpa_supplicant
update_config=1
- Then you need to update
/etc/network/interfacesas the following, with you data:
auto lo
iface lo inet loopback

allow-hotplug eth0
iface eth0 inet dhcp

allow-hotplug enx606d3cd527e6
iface enx606d3cd527e6 inet dhcp

allow-hotplug wlan0
iface wlan0 inet dhcp
    wpa-ssid myssid
    wpa-psk ccb290fd4fe6b22935cbae31449e050edd02ad44627b16ce0151668f5f53c01b
After rebooting, the OBC should be able to connect to the network.
[Optional] Access though SSH from a another computer
TODO.